

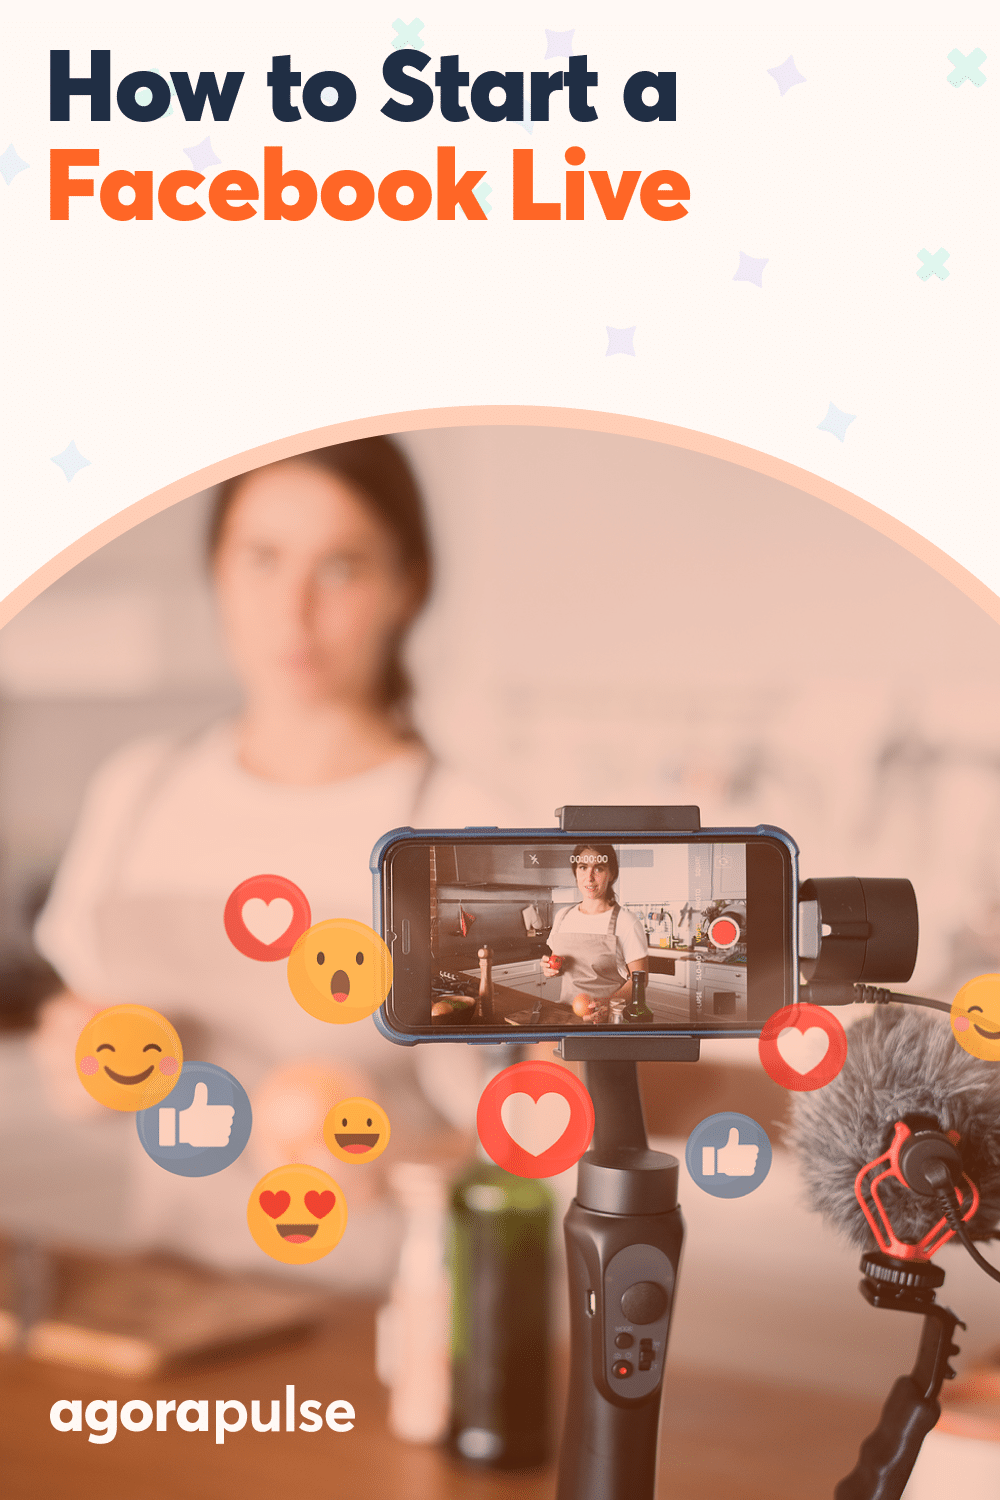
If you want to go live on Facebook, this is your quick guide to getting everything squared away before you broadcast, creating true engagement with your live viewers, and scheduling your Facebook live video for future awesomeness.
Facebook Live can be an amazing way of connecting with your audience. If you are considering starting a Facebook live show, where do you start? What do you need to do?
Let’s start with the basics.
Choose Whether to Go Live From Mobile or Desktop
Going live from mobile and going live on Facebook from the desktop are two completely different experiences.
Mobile is great for events and off the cuff live broadcasts. Also, many tools can make live video streaming from mobile experience better. But in most cases, the desktop option will create a more professional show for your video content.
How to go live on Facebook from your mobile
From your Facebook app click the Publish button, tap the Live video icon, give your video an SEO-rich description, and click Start Live Video.
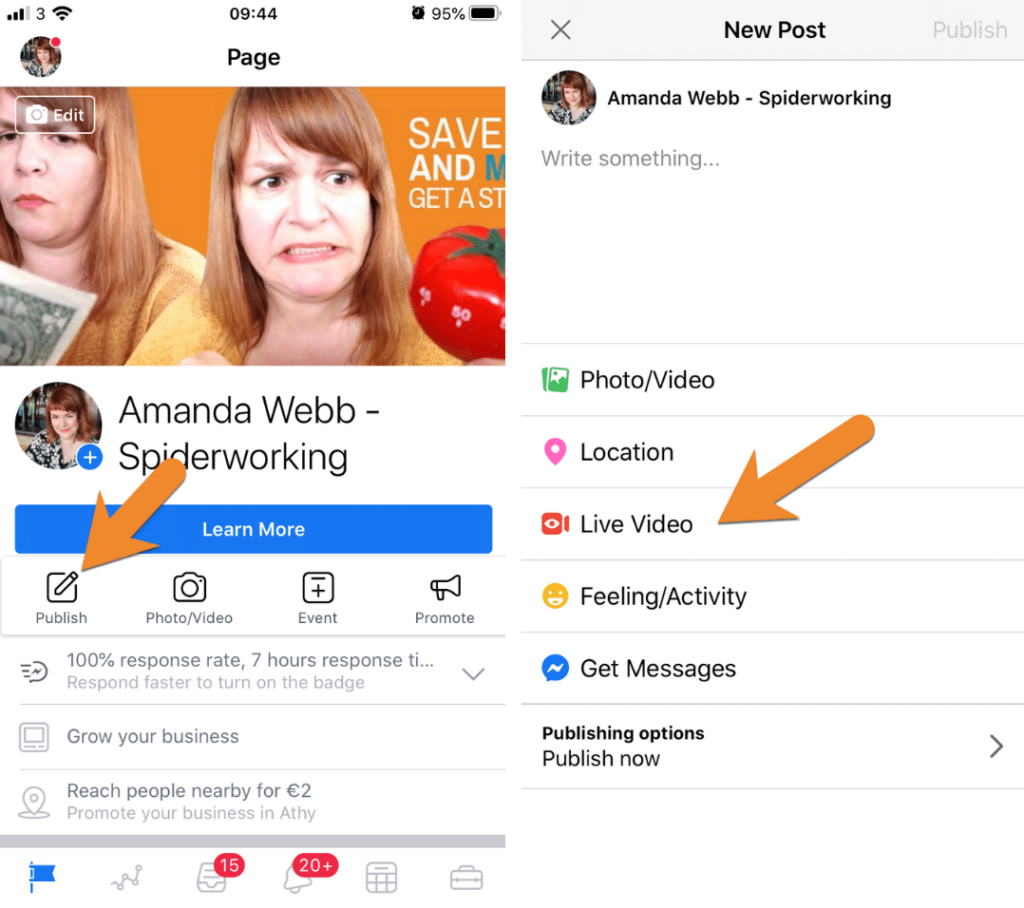
Create a Facebook Live from the mobile app
The fun thing about mobile is that you can add masks and filters to your broadcast.
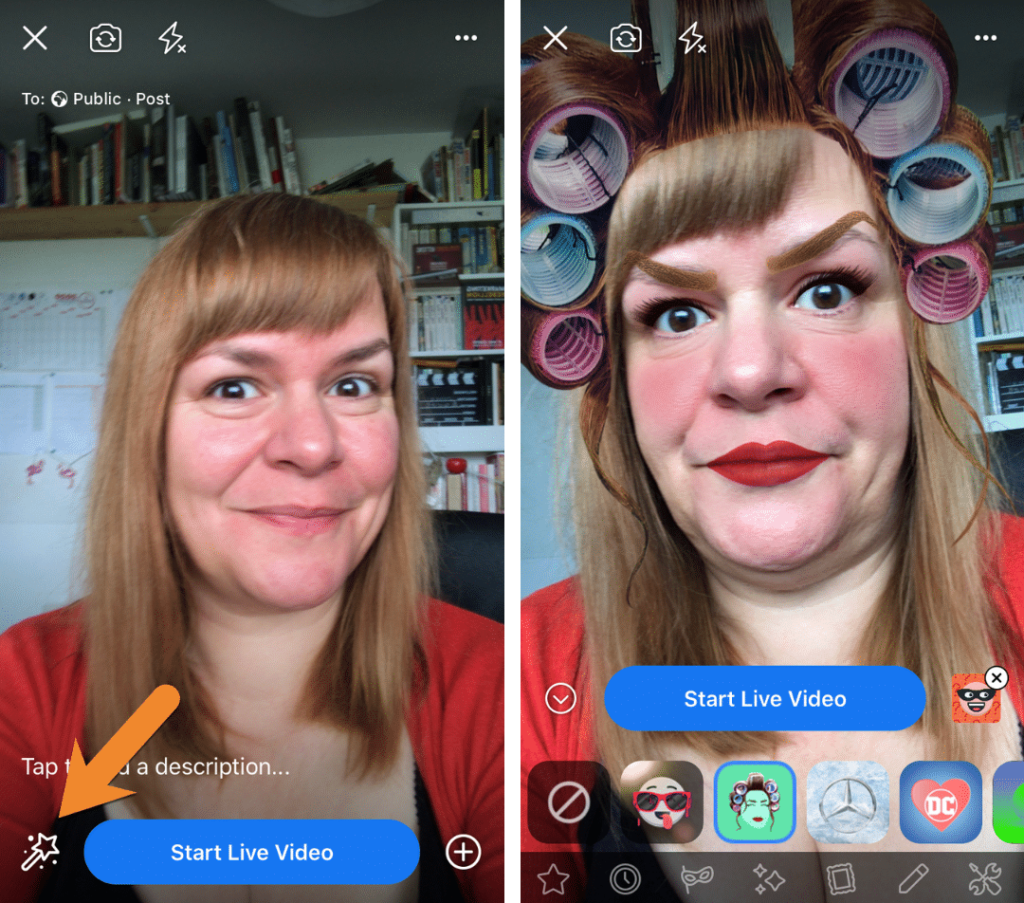
For fun broadcasts using Facebook Live add filters
If you are going live from the Facebook app, you are limited to the portrait/vertical format. If you flip your phone around to landscape, the video will post on its side in the Facebook feed.
You can overcome this using mobile third- party software, we’ll talk about this later. (In a hurry? Download our FREE Facebook Live step-by-step guide right now.)
I love the in-the-moment rawness of live from a phone … but for a more professional broadcast, you can’t beat a desktop computer.
Facebook even gives us a cool suite of tools to enhance our desktop broadcasts.
Related Post: How to Schedule Facebook Posts
How to go live on Facebook from your desktop
From your Facebook page click the Live button. This brings you into Live Producer.
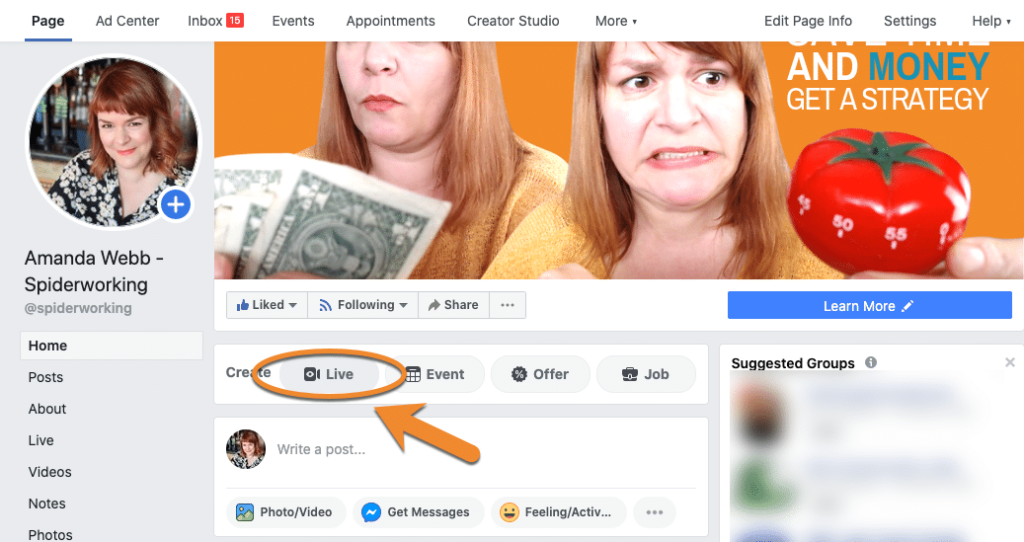
Starting a Facebook Live from your Facebook page
From here you can schedule video on Facebook, share your screen, add graphics, display comments as overlays, and more.
Plus, you can create test broadcasts, only visible to page admins. Those are great for running tests and rehearsals before you broadcast to the world.
Let’s look at the key features of Live Producer.
Start a Broadcast in Live Producer
To start a broadcast, ensure the correct page is selected, give your broadcast a title.
- Click on the Use Camera icon.
- Scroll down to select the correct camera and microphone.
- Click the Go Live button.
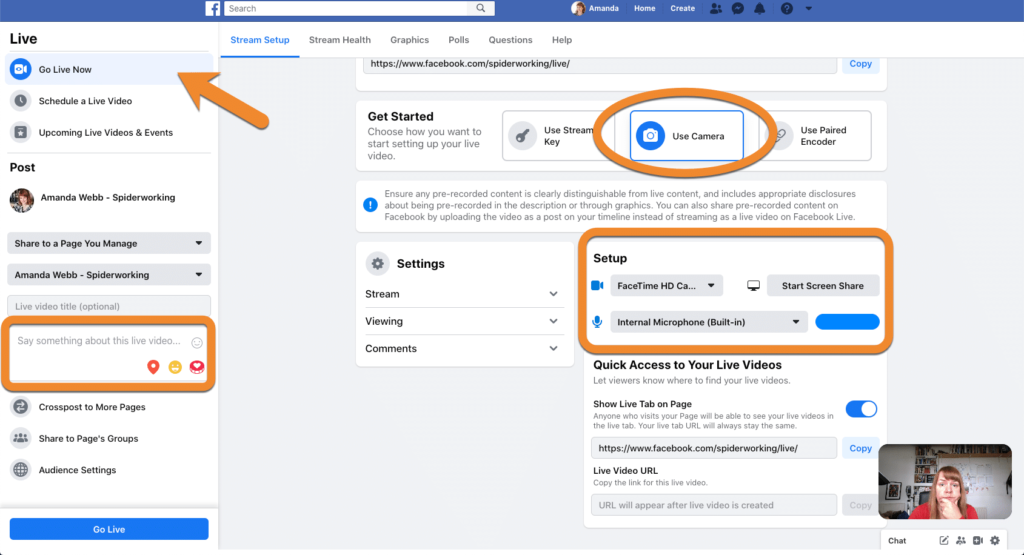
Live producer for Facebook Live
That’s it you’re live, smile!
Now, you may choose to take a little more time to schedule your Facebook live broadcasts and fill up your social content calendar ahead of time.
Schedule a Broadcast in Live Producer
Scheduling a live broadcast in advance creates an announcement post on your page’s timeline. People can click the Interested button to get a notification from Facebook when you start your broadcast.
This announcement post becomes the live broadcast as soon as you start streaming. This means you can use the link to that post to promote your show in advance.
To schedule your Facebook Live
- Select Schedule a Live Video from the menu.
- Set a date and time and add an image to grab the attention of those who see the post.
- Click Schedule Live Video.

Schedule a Facebook Live broadcast from Live Producer
Start Your Scheduled Facebook Live
When it’s coming close to broadcast time click Admin Only: Edit Your Details, which you’ll find overlayed on the post. This brings you back into Live Producer.
- Select Use Camera, and choose your camera and microphone.
- At the scheduled time your broadcast will automatically go live.
- If you want to start the stream yourself, click Enable Manual Mode at the bottom left of the screen.
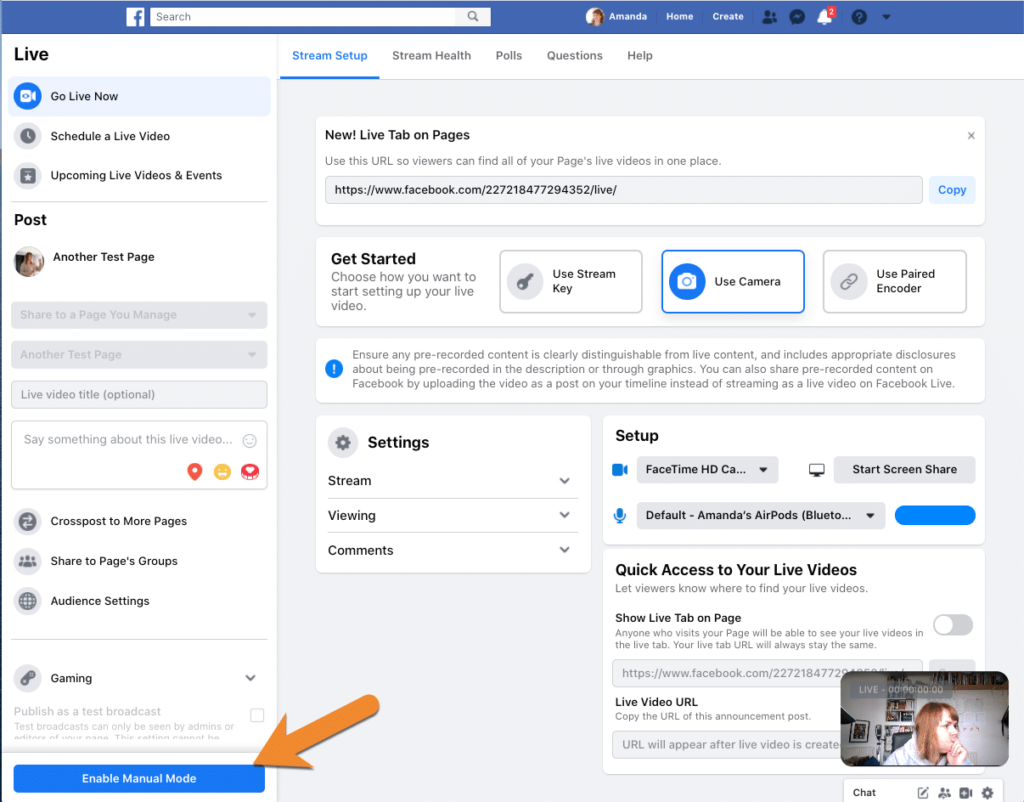
Enable manual to go live before your scheduled time
Admin-only Mode
If you are nervous, or if you just want to practice your show ahead of time, Live Producer has a feature that lets you go live just to other page admins.
It’s a great way to check everything is working properly and to get used to being in front of the camera.
When setting up your live broadcast, scroll down on the left-hand side, and check the box Publish as a test broadcast.
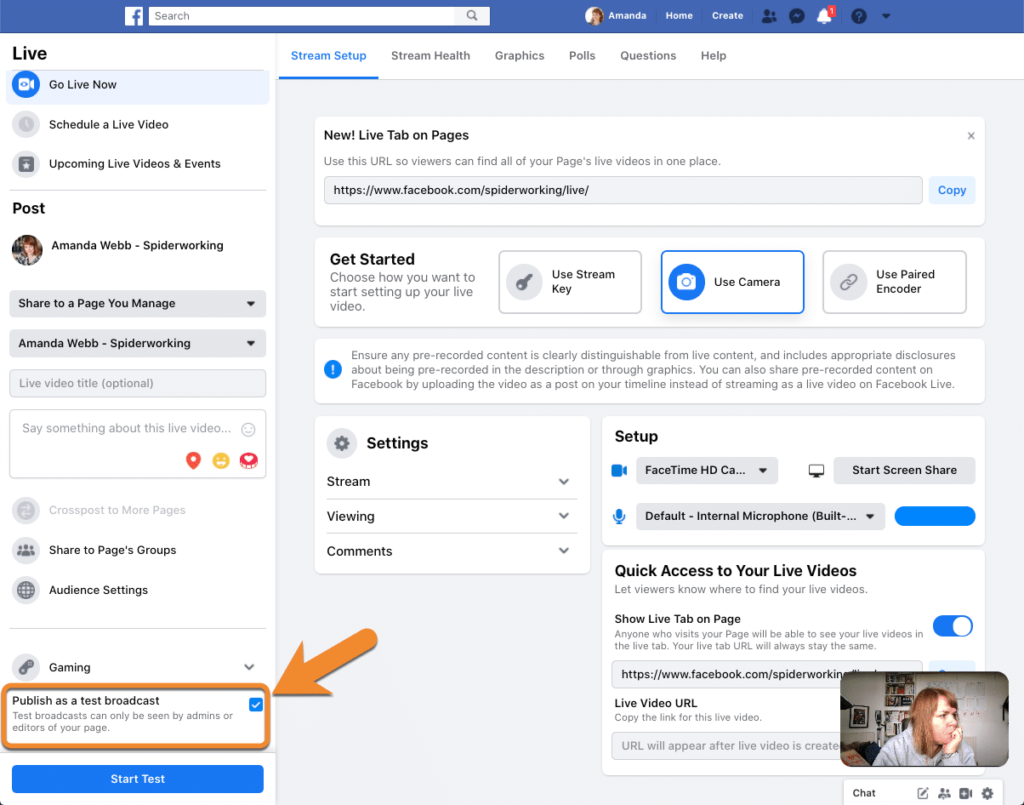
Test Facebook Live broadcast
As before, select Use Camera and then click Start Test.
This option isn’t available for scheduled broadcasts.
Screen Sharing in Live Producer
Screen sharing is useful, particularly if you are using Facebook Live to teach. You can share your presentation or show people how to do online or computer tasks.
Live Producer has an option to share your screen instead of using a camera.
Choose from a whole screen or an application window.
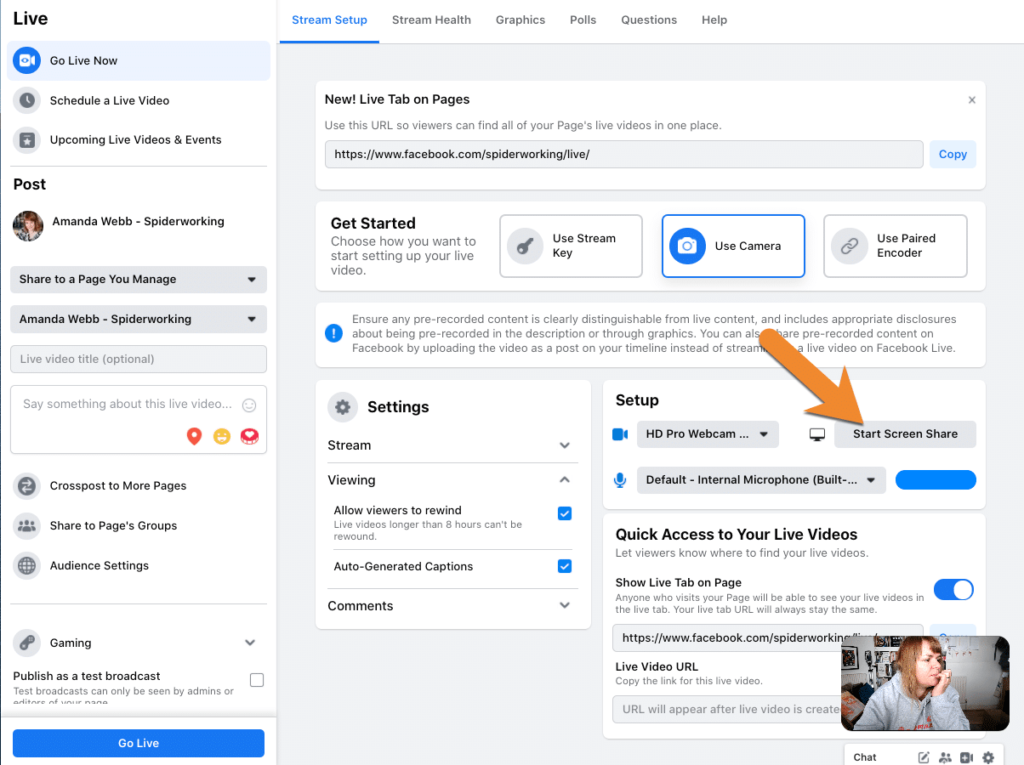
Share your screen for your Facebook Live using Live Producer
Before you use this option, it’s good to know that Live Producer doesn’t seem to allow you to switch between camera and screen. You’ll need to rely on third-party software if you want to do this.
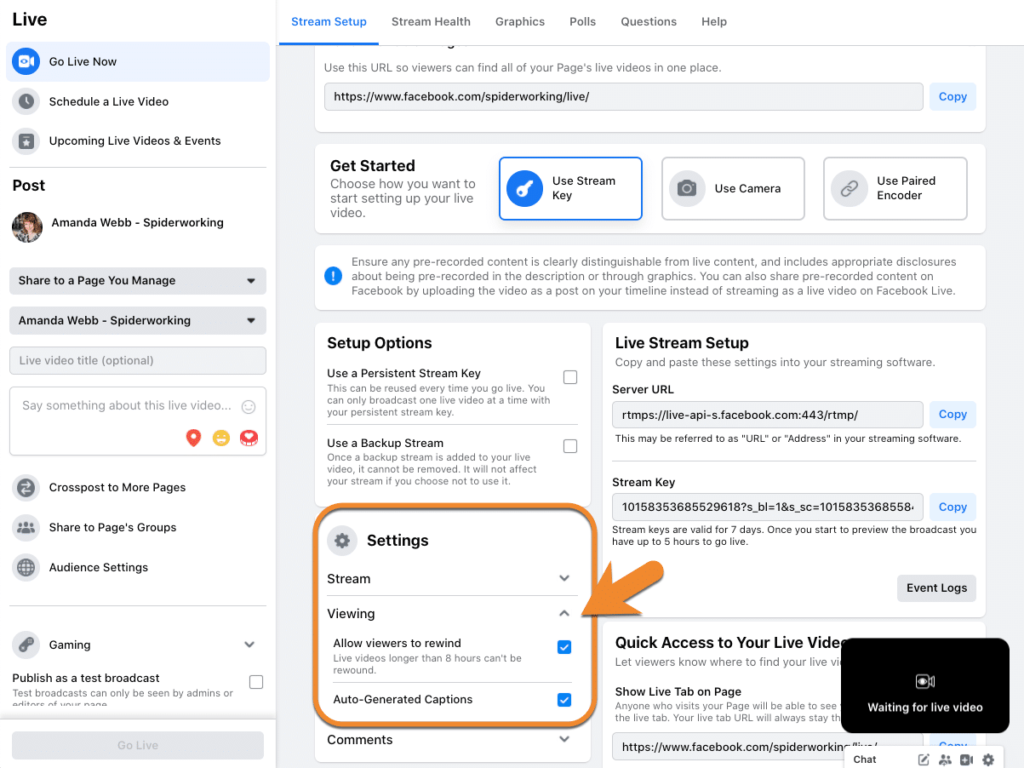
Set Up Live Captions in Live Producer
If you don’t caption, people who are deaf or have hearing difficulties will be unable to know what you are saying. People who aren’t able to watch with the sound on will lose interest.
Live Producer enables live captioning. When switched on, it will add subtitles to your broadcast as you speak. They aren’t 100% accurate but you can get a pretty good result if you speak slowly and concisely.
To switch on this option, click Viewing under Settings, and check the box next to ‘Auto-Generated Captions.
Enable auto-generated captions for your Facebook Live
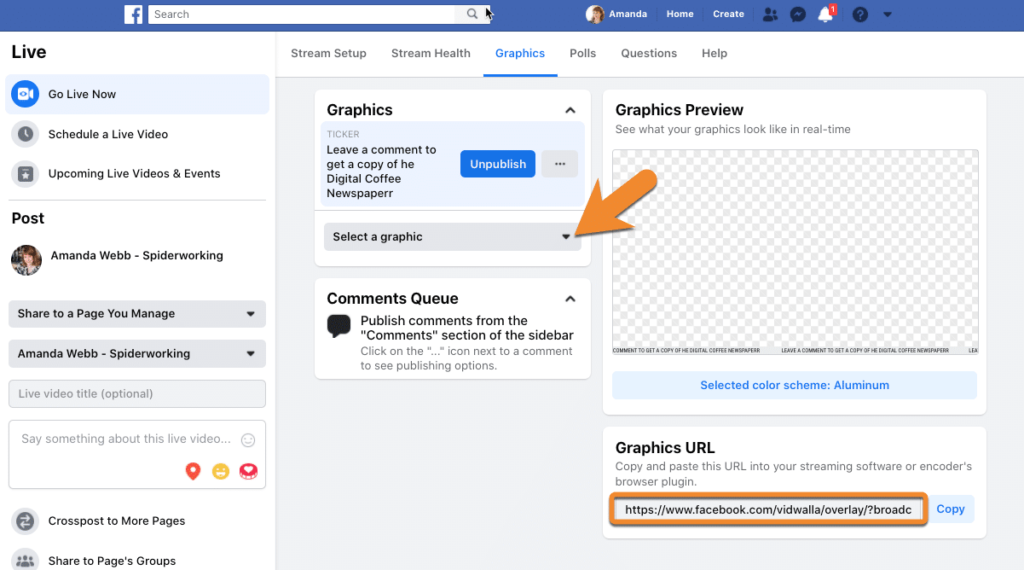
Set Up Graphics in Live Producer
Adding graphic overlays to your broadcasts can enhance the viewing experience and because it makes your video more visually interesting you will hold the viewer’s attention for longer.
If you stream using third-party software, you can add graphics to your broadcast using Live Producer. Those graphics can add comments on your screen, add an image overlay, a logo, or a moving ticker.
You’ll find this under the Graphics tab. Select the type of graphic you want to add.
Add graphics to your broadcast using Live Producer and third-party software
This gives you a link that you can plug into your streaming software.
Here’s a ticker I made for my live broadcasts. (I’m looking forward to getting more control over the design.)
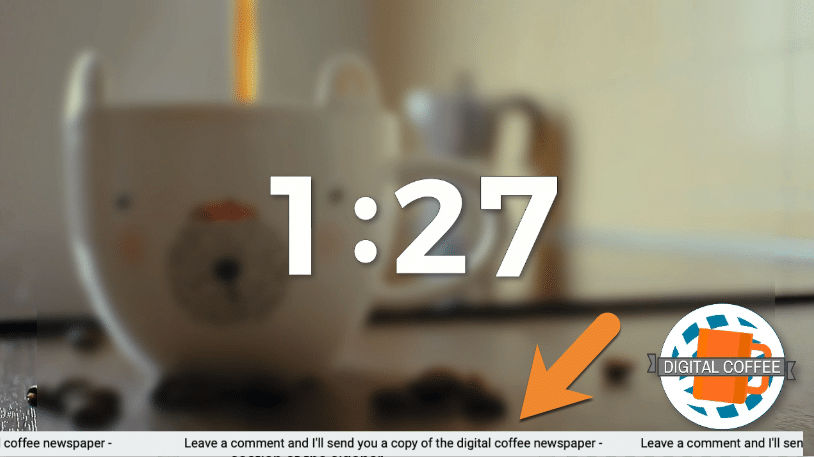
Facebook Live ticker in action
Facebook Live Apps and Tools
I love how feature-rich Live Producer has become—but like everything on Facebook, it’s glitchy. You don’t have enough control over what you’re doing, and it’s hard to manage when you are a one-woman show.
Third-party software integrates with Facebook Live, gives you extra features, and saves you the pain of having to wrestle with Facebook directly.
There’s a bunch of software products you can use for live streaming on Facebook.
Favorite Facebook Live tools
Instead of boring you with a full review, I thought I’d introduce you to the two I couldn’t live without.
eCamm Life
eCamm Live makes me happy to be a Mac user. It’s what I use for my live broadcasts and I love it. (Sorry, Windows users, it is only for Macs.)
eCamm Live has a user-friendly interface that makes it simple to feature comments, bring in graphic overlays, and play pre-recorded video snippets.
You can also go live with a guest using the Skype integration. There are even built-in sound effects. Also, it supports green screen, and you can use your phone as a camera.
My only gripe is the Skype integration. Skype is heavy on my MacBook’s memory, as is live streaming. So for my interview shows, I use Streamyard.
Streamyard
Streamyard is browser-based software. which means you can use it on any computer. It’s also available on the mobile web. You can use it from anywhere. This fixes many of the problems I have with going live from mobile directly from the app.
Also, it has many features to match eCamm live including text overlays, featured comments, green screen and pre-recorded video overlays.
The killer feature is the ability to add guests just by sharing a link.
There’s no software required, no login; they just click the link and join you.
The downside of Streamyard for me is that you don’t have a lot of control over the positioning of your graphics as you do on eCamm. Also, there’s currently no Stream Deck integration. More on Stream Deck shortly.

Necessary Equipment
One of the things I’ve always loved about Facebook Live is that it’s accessible to anyone with a smartphone.
I’ve upgraded my kit over the four years I’ve been running my live show. Here’s what’s in my kit bag and on my wishlist.
Streaming from mobile:
Microphone
The microphone on your phone is pretty good but if you’re in a noisy space, you’ll struggle to get heard.
In my kit bag, I have a Rode Video Micro. It’s a directional microphone that is excellent at picking up just the sound directly in front of it. The first time I used it I was in a busy pub but my interview subject could still be heard perfectly.
The video micro mounts on a camera or tripod or works as a handheld microphone. The VideoMic also from Rode mounts on your smartphone.
Stability
To avoid shaky video, I use an iOgrapher mount for my phone. Your phone slots into it giving you two handgrips and mounts for a microphone, like the Rode VideoMicro, lights, and other accessories.
You can also attach it to a tripod.
Streaming from desktop:
Camera
The webcam on my Mac has seen better days … It doesn’t like it if the room is too dark and it loves to pixelate bright colors.
Buying an external webcam means you are no longer tethered to your computer. You can clip it onto anything or mount it on a tripod so you get the best possible angle.
I use a Logitech C20 for my streams. It shoots high-definition video, and the picture is always pin-sharp.
Have the right equipment for your Facebook Live.
On my wish list is the Logitec Brio, which can handle 4k video. (I do worry about how much makeup I’ll need to wear when I upgrade, though!)
Microphone
Just like with mobile, a good microphone can enhance your sound quality, eliminate background noise and it can even make your voice sound fuller.
I have two microphones in my kit bag:
- Blue Yeti is a good all-around microphone. It plugs straight into the USB port on your computer and comes with its own stand.
- The Rode NT1-A makes my voice sound even better. But, it needs to be fed through a mixer to plug into my laptop.
Vision mixing
A new addition to my kit bag is the Stream Deck XL. It is a vision mixer that allows you to add graphic overlays, video clips, and sound effects to your live broadcast at the click of a button.
I use it in conjunction with eCamm live, but it also has integration with some other live streaming platforms.
Greenscreen
If your workspace isn’t camera-ready a green screen can place you in any environment you choose. Compatible live streaming software will replace the green of the green screen with a photo or video.
The Elgato Green Screen is on my wish list. It comes with its own pop-up stand, making it easy to assemble when you need it.
Lights
The best light for your broadcasts is natural light. Whenever possible shoot in a space with a lot of natural light.
Place yourself with the light and camera facing you. If the light is behind you, even the best webcam will struggle to adjust the exposure for you against the background.
Some days, even in a room full of windows it’s just too dark to shoot. For these days, you’ll need lighting.
I’m currently using low-cost lights from EEDDI. They do the job but they take up a lot of space in my already tiny office.
Ring lights
Ring lights are popular with a lot of vloggers. They are designed to face you, and many ring lights have a phone or webcam mount in the middle.

Get the lighting right to avoid squinting, overexposure, and other newbie mistakes on Facebook Live.
The problem with these lights is that, as they face straight onto you, they can make you squint. If you wear glasses, it will be difficult to get a shot without them reflecting in your lenses.
To avoid this move the ring off slightly to one side.
Set Up to Go Live on Facebook
You have all the tech in place, now it’s time to go live. Almost. Before you click the button here are some things you need to check.
Internet speed
Is your Internet connection working properly? Do a speed test to ensure you have a stable and strong upload speed. Ideally, you need 10 Megabytes per second.
Ask everyone else who uses the Internet in your workspace to switch off during your broadcast. When possible, hard-wire into the internet router for a more stable signal.
Background
What is behind you and in the shot? (I once managed to broadcast a whole show with laundry hanging on the radiator!)
Don’t make the same mistake. Before you go live check what can be seen in the background and remove anything you don’t want people to see.
Camera angle
It’s flattering to set up your camera at a high angle, but if you overdo it you lose authority. Your audience is looking down on you—and you’ll look vulnerable.
Instead set up the camera as close to eye level as possible, your audience won’t know why but they’ll feel like they are on a level with you.
Where to look
If you are running your own show, it’s tempting to look at the screen. After all, that’s where all your tech is, and that’s where your face is staring back at you.
Eye contact is an important signal to your audience that you are talking to them, so you need to ignore the screen and look at the webcam.
To avoid my own face distracting me, I stick post-it notes over my face on the screen. They remind me where I should be looking!
Running order
A great live show requires planning. You need to engage your audience fast and keep them interested. Don’t be tempted to script the whole show and read from an autocue. Doing so strips you of your energy and style. Instead, write some quick notes for the show.
Start by welcoming viewers. Tell them what the shows about and then work your way through the key points you want to cover.
In Conclusion
Doing a dummy run through will flag any tech issues and help you stay on track. Plan to do your rehearsal at least an hour before you go live. This gives you time to address any issues that arise.
Now you’re ready to go! Click the Go Live button and welcome your viewers.
Get started on saving time and energy on your own social media management! Check out our free trial of Agorapulse to help you schedule, track, and measure all your social media efforts.


