

Facebook advertising can be complex and confusing. Luckily, there are a number of Facebook ad tools that make it easier for business owners, marketers, and even ad specialists to do their job.
I set up my first Facebook ad in 2012. At the time, boosted posts were called “Promoted posts” and I, like many others, started my advertising journey by clicking the “Promote” button.
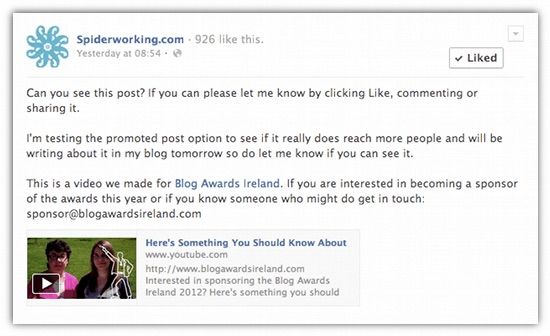
My first ‘Promoted post’ – Facebook ads have gotten harder since
That ad was the beginning of my Facebook advertising journey and boy have things got complicated since.
Now when I sit down to create ads I’m faced with a plethora of options. There are different audiences I can create, different creative options, new ad types and the new conversion pixel.
To give credit to Facebook, *some* of the ad creation process is simple. For example, setting up an ad in Ads Manager is straightforward and the creation interface is intuitive. Other areas are overly complicated or feel like they’ve been left incomplete. That’s why we need Facebook ad tools.
Here are five of my favorite Facebook advertising tools, broken down by the problems they solve.
1. Pixel Caffeine
What are pixels?
If you have a Website and run regular Facebook ads, you need the pixel. It builds a warm audience of website visitors that you can retarget them. The pixel can also measure conversions. So if someone buys a product after seeing your ad you’ll know about it.
Good stuff, right?
Well, there are two problems with the pixel:
- Adding the audience building part of the pixel to your website is relatively easy. Just add a line or two of code to the head section of your site. Adding the conversion section is harder. You only add it to specific pages (ex. your thank you pages). This is harder, particularly if you run a WordPress site.
- Instead of targeting all the people who visit your site, you’ll want to target segments of them. For example, I like to retarget the people who visit the podcast posts on my page and try and sell them my blogging clinics. I also like to retarget the people who visit my Facebook ads blog posts with my ad management service. To do this in Facebook ads manager, I’d have to manually copy and paste each blog post URL into the interface to tell it which pages I wanted to build my audience from.
It’s a long, boring, and frustrating process.
The solution
Pixel Caffeine is a free WordPress plugin from AdEspresso. This Facebook ad tool solves both of these problems and more. Let me show you how.
Solving Problem #1
Let’s see how Pixel Caffeine makes installing a pixel so much easier.
First, install the plugin and follow the instructions to hook it up to your Facebook account. Choose the ad account you want to grab the pixel from, and choose your pixel.
Give Pixel Caffeine access to your Facebook account.
Select your Facebook ad account and pixel.
And with that, your main pixel is installed. Easy.
To add the conversion element of the pixel, click on “Conversion events”:
- Give your event a name
- Link to the page you want to add the conversion event to (a thank you or purchase success page)
- Choose the type of conversion you are measuring
- Click “Create tracking”
Create a ‘conversion event’ so you can measure conversions from your Facebook ads.
Solving Problem #2
Here’s how the tool helps you quickly creating quickly create custom audiences:
- Click the ‘Custom Audiences’ tab
- Give your audience a name
- Decide on the number of days you want to collect information from
Create a custom audience within Pixel Caffeine.
Now on to the cool bit.
Just like in Ads Manager, you can select individual URLs to build a custom audience from. OR you can select people who visited posts in a specific category on your site or those who visited pages and posts with a specific tag.
I love this feature. I can now target people depending on what category of my blog they visited.
Click ‘Add new filter’ under ‘Special filters’ to find the option.
Click ‘Add new filter’ to access blog categories and more.
Pixel Caffeine will begin collecting that audience for you and you’ll find it in Facebook Ads Manager when you go to create your next campaign.
Cost: Free
2. Facebook Pixel Helper
The problem
You’ve asked your web developer to install the pixel. They’ve told you it’s done.
How do you ensure that the right pixel is on the right page and that Facebook has identified it? In other words, how do you know if your pixel is working?
The solution
Facebook Pixel Helper is a Google Chrome extension that will identify Facebook pixels on any Web page you visit.
Add it to your Chrome browser and a widget appears on your toolbar. It displays information about pixels installed on the sites you visit.
To see if your pixels are firing correctly, visit your website. A green number will appear on the pixel helper widget.
See what pixels are added to each webpage on your site.
Click on it to see more detail on the pixels it has identified.
As well as letting you know what pixels are installed, it will also give you suggestions related to your pixel. As you can see, there’s an issue with my pixel load time — something I’ll have to fix.
Pixel Helper will identify pixels on your site and any issues it finds.
With this Facebook ad tool, you can check your thank you pages to ensure your event tracking is set up. See my thank you page below has the lead event tracking code installed.
See what pixels are added to each webpage on your site.
Cost: Free
3. LeadsBridge
Lead Gen ads were launched to solve a serious problem. It takes time for Facebook to load a Web page on its mobile browser so if you are trying to send people to your site to convert you will lose a chunk of people who aren’t willing to wait.
Lead gen ads sit within the architecture of Facebook and are auto-filled. This makes it much easier for businesses to collect email addresses and subscribers. You can read more about how to set up Lead Gen ads here.
The problem
When Facebook launched Lead Gen ads, they didn’t let you connect them to your CRM (Customer Relationship Management software) or email provider. You had to manually download responses and then upload them to your system. Yuck!
The solution
Although Facebook has made some updates recently that do allow you to connect certain services, LeadsBridge has addressed the problem from the start.
It collects leads from Lead Gen ads and delivers them to your CRM or email marketing provider
Connect Leadsbridge to your Facebook accounts and create a ‘Lead ads bridge’.
You’ll be prompted to connect your CRM or email provider, your ad account and then your lead form.

Connect Leadsbridge to your CRM
It’s simple to set up and you’ll see the leads rolling into your system from your ads.
Now I can add new subscribers to an automation sequence and start turning them into customers from the start.
Cost: Starts at $29 per month
4. Creative Hub from Facebook
When you work with clients, you need to be able to show them a mockup of their ads before you go live. These mockups often happen very early in the client/advertiser relationship.
The problem
Up until recently, if you wanted to create a mockup ad on Facebook, you’d have to go through the entire ad creation process. Unless you purchased the ad, you’d have to repeat the process for each creative option. If it needed editing, you’d have to start from scratch.
The solution
Although there were other ad mockup sites before, the ones I used were slow. Facebook came up with the solution themselves as part of their ‘Creative Hub‘ tool.
You can access Creative Hub from your ad account (or business manager) by clicking the hamburger menu on the top left hand side of the page and selecting “Creative Hub.”

Select ‘Creative Hub’ from your Ads Manager menu.
Click the green “Create Mockup” button at the top right hand side of the screen and then select your ad type.
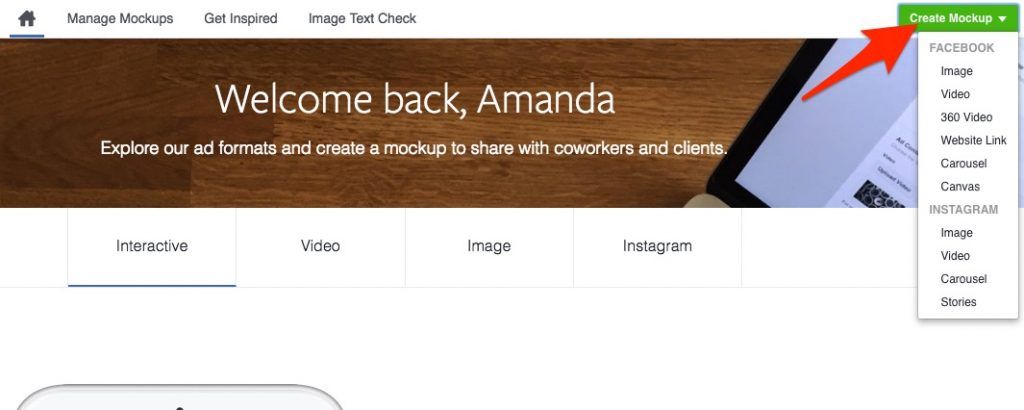
Choose the ad type you want to mock-up
You can create an ad mockup from scratch. Include a page name and profile page to give it the full published look.
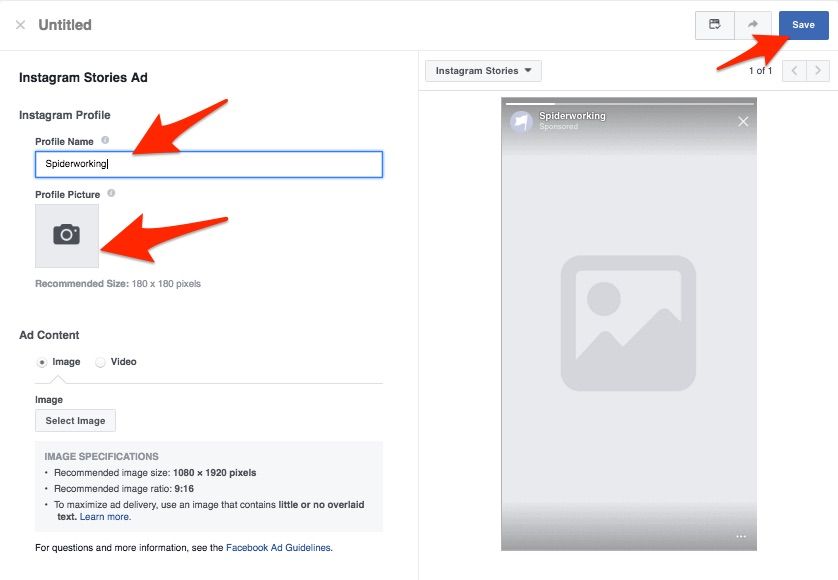
Add a page name and profile picture for a full published look.
Once you’ve created your mockup, save it for later and share a live link to with clients and other interested parties.
This is a great space for you to play with the newest ad placements. See the Instagram Stories ad placement in the example above.
Cost: Free
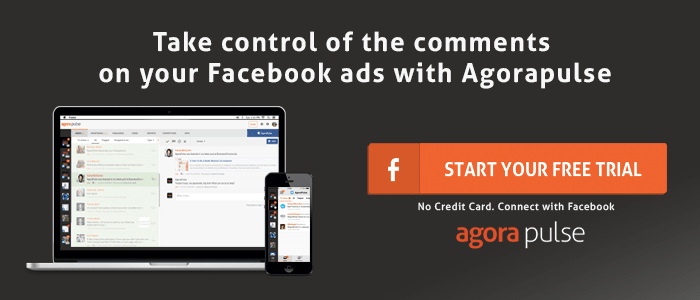
5. Agorapulse
The problem
It’s easy to miss comments on your Facebook ads. They get lost among your general notifications and as most ads aren’t live on your page you can’t scroll through and see what you missed.
The solution
Agorapulse has an easy way for you to keep on top of your ad comments.
- Navigate to your Facebook page
- From your Inbox select ‘Type’
- Choose ‘ad comments’ from the drop down menu
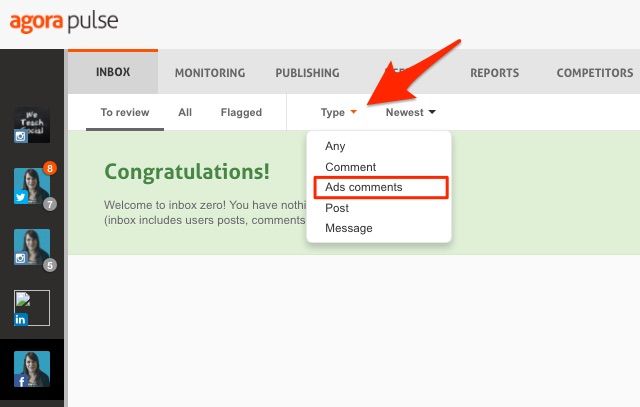
Find ad comments on your Agorapulse dashboard.
You can view and respond to any of those ad comments you missed.
Cost: Starts at $49 and includes monitoring, publishing, and reporting for three Facebook pages. Want to test it out first? Then sign up for a free trial.
Your Turn
These are my top tools for making my Facebook ads life easier. What Facebook ad tools do you use that save you time and stress?


