

Have you ever scheduled an entire social media campaign for a client only to learn that you accidentally used images from the wrong photoshoot? Are you constantly asking busy agency colleagues to share approved assets—and receiving radio silence in response?
There has to be a better way to store, share, and organize social media assets. Right?
Fortunately, there is! Whether you want to save time or minimize mistakes, a digital media library offers a smart solution for social media teams. Find out how the Agorapulse asset library can improve your agency’s workflow, so your team can optimize social media content more efficiently.
Why Agencies Need a Digital Media Library
Does your social media agency really need an asset library? Yes! Agorapulse’s digital media library directly links to our social media publishing solution, so it can store photos and videos, and streamline post scheduling. Take a look at how this type of tool can benefit your team.
1. Save time
Does your social media content creation workflow involve a bunch of disconnected tools? For example, every time you create a post, you may have to search your email inbox for assets, then optimize them in an editing program, and finally upload them to social media.
When you use Agorapulse, you can save time by skipping a lot of your typical steps and tools. Instead, just upload assets to your digital media library as soon as you receive them from clients or colleagues. You can optimize them for various social media channels and attach them to posts without leaving the Agorapulse dashboard.
2. Improve collaboration
Do you find that sharing creatives with colleagues doesn’t always happen as quickly or as smoothly as you’d like? If getting colleagues to share assets is a constant struggle, a digital media library can make collaboration much easier.
When you add creative assets to your Agorapulse library, everyone on your team can access them instantly. That means your team can create content using the same files, allowing for seamless collaboration. You won’t have to wonder whether an asset is approved or worry you don’t have the latest version.
3. Reduce errors
Creative assets often go through several series of edits. But it’s tough to keep track of what’s approved and what’s outdated, especially if you’re downloading files from email or chat apps. That may mean you end up creating content or publishing posts with the wrong images or videos.
With an asset library, it’s much easier to avoid creative errors. You can ensure that everyone uses assets from the same pool. You can remove outdated content or label approved assets to keep your team on the same page.
How to Organize Content in an Asset Library
Are you curious how your team could organize social media assets with Agorapulse? Let’s look at how the asset library works and explore how you can easily store and share content.
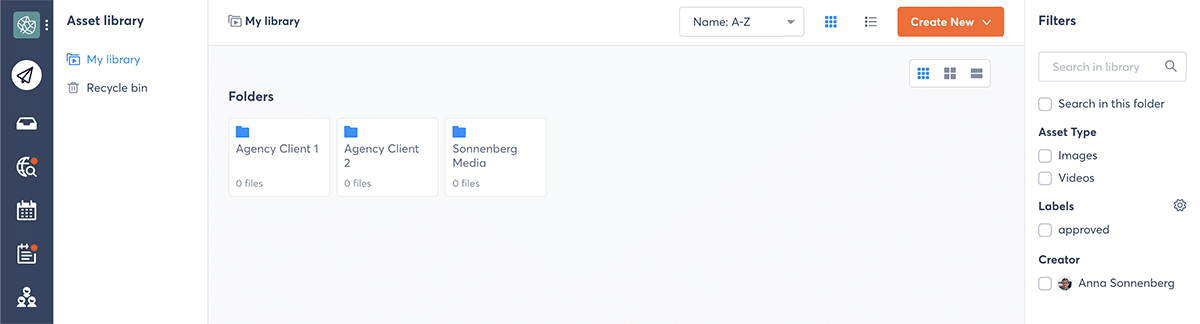
Create client content folders
Whether your agency manages a dozen or a hundred clients, you don’t have to worry about mixing their assets together. Start by creating a separate folder for each client to keep everyone’s content separate.
Do you manage your agency’s own social media marketing from Agorapulse? You can create a folder for your agency’s creative assets, too.

This step is easy. Click on the orange Create New button and select Create a new folder. Then repeat the process until you’ve established a folder for each client.
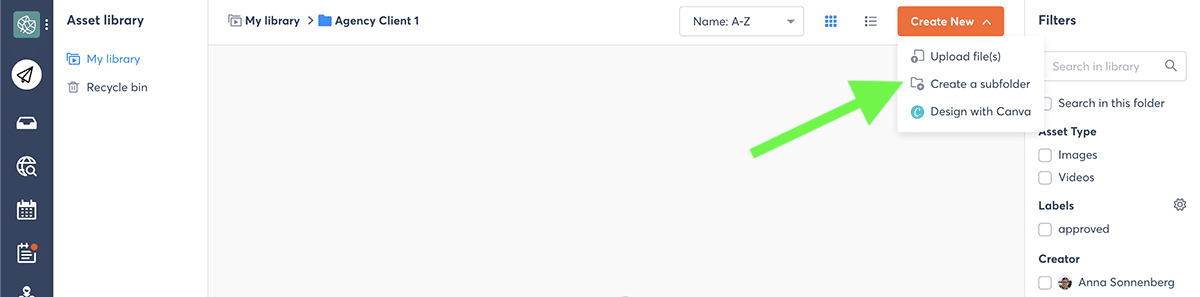
Set up a subfolder system
You could just start uploading images and videos to each client’s folder. But when you want be able to find assets easily, you need a subfolder system. Agorapulse allows four levels of subfolders, so you can get as granular as you’d like.
Click on any client’s folder to open, and press the orange Create New button. Select Create a subfolder and give it a name.
How should you manage subfolders?
It depends on the types of clients you manage and the campaigns you run. You may need to create subfolders for different types of content, various campaigns, or even times of year. See the next section to get ideas for what to store in your asset library.
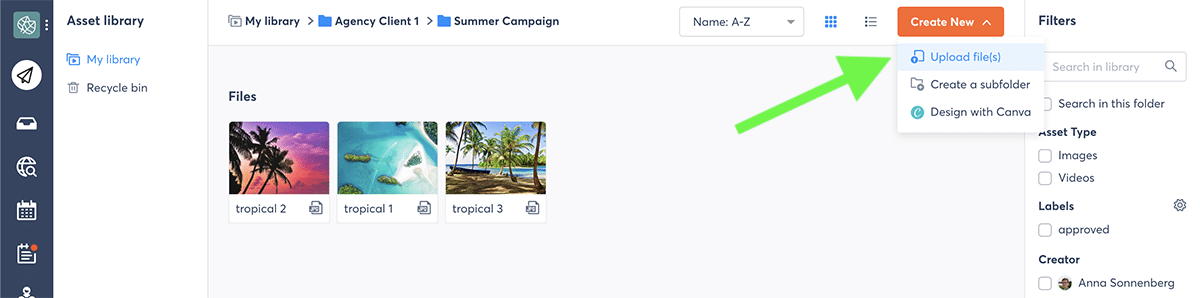
Upload and edit creative assets to your asset library
When you’re feeling organized, you can start uploading content. Drag and drop individual files or entire groups of assets into any folder in your library.
Alternatively, you can click the orange Create New button to locate and upload files.
After uploading files, click on any asset in your library to review and edit details. You can change the name of any asset to make images and photos easier to identify.
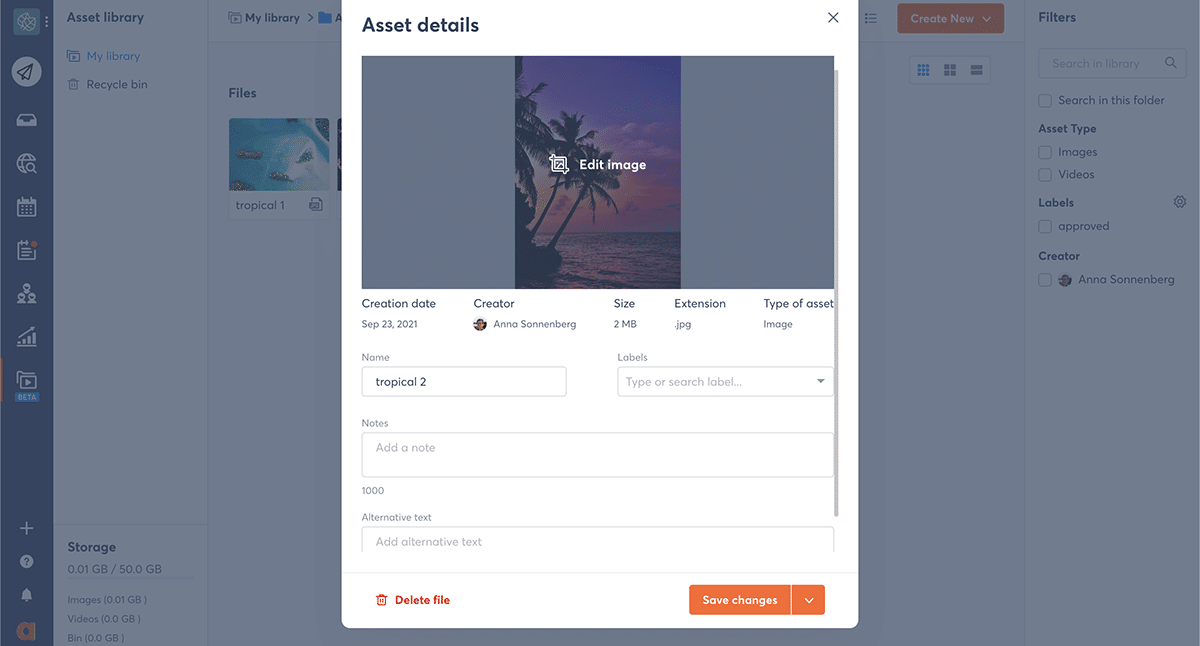
You can also edit image sizes directly in Agorapulse. Click on the Edit image prompt to open the in-app image cropper and optimize assets for each platform. To save time when creating content, you can also add alt text to images directly in your asset library.
Integrate Canva designs
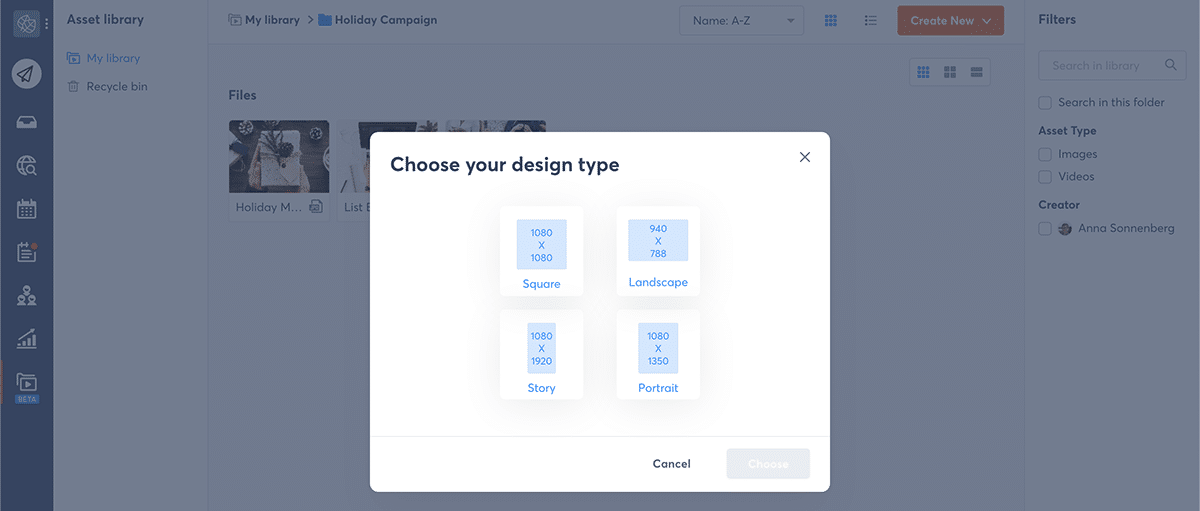
With Agorapulse’s Canva integration, it’s easy to do more extensive editing or even design social media assets from scratch. From your asset library, click the orange Create New button and select Design with Canva.
Choose the type of design you want and start creating.
You can access Canva templates, elements, and uploads from the integration. If you’ve already created a design that you want to add to your media library, click the All your designs tab to locate it.
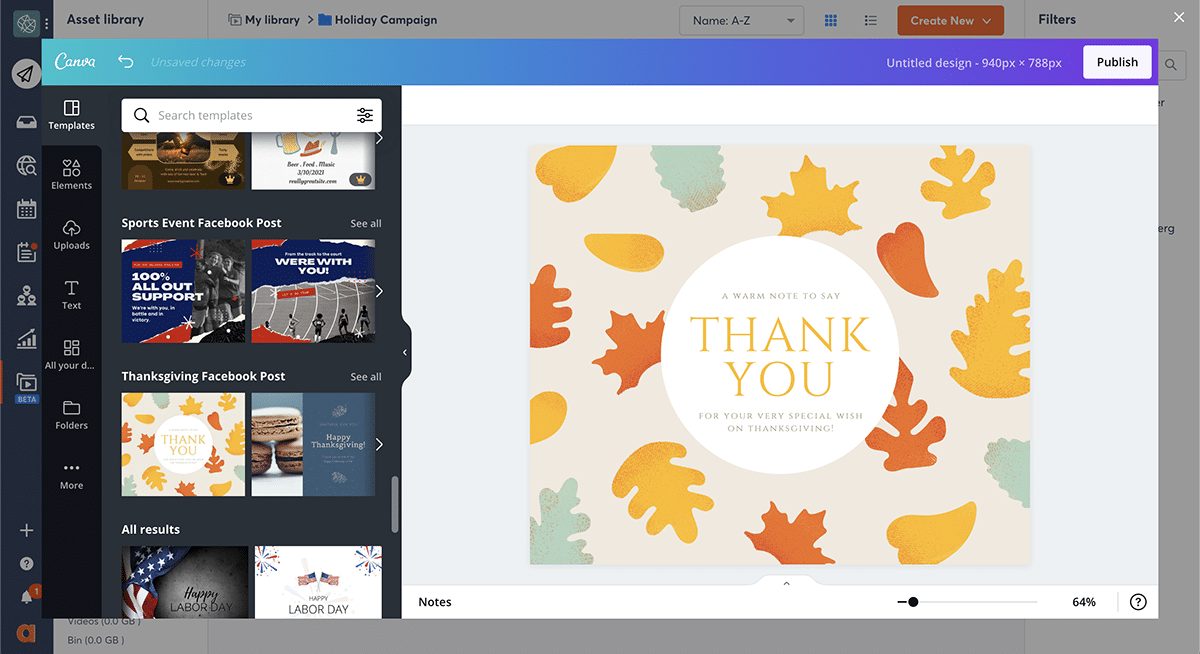
When you’re happy with your design, click the Publish button in the upper right corner to add it to your asset library. In the library, you can resize the image, change its title, or add tags for better organization.
Add content labels
Folders and subfolders are great. But what if you need an additional level of organization for your library?
You can add labels to your content, so you can find or filter it more easily. For example, you may want to label assets that are still in draft form and require approval from clients.
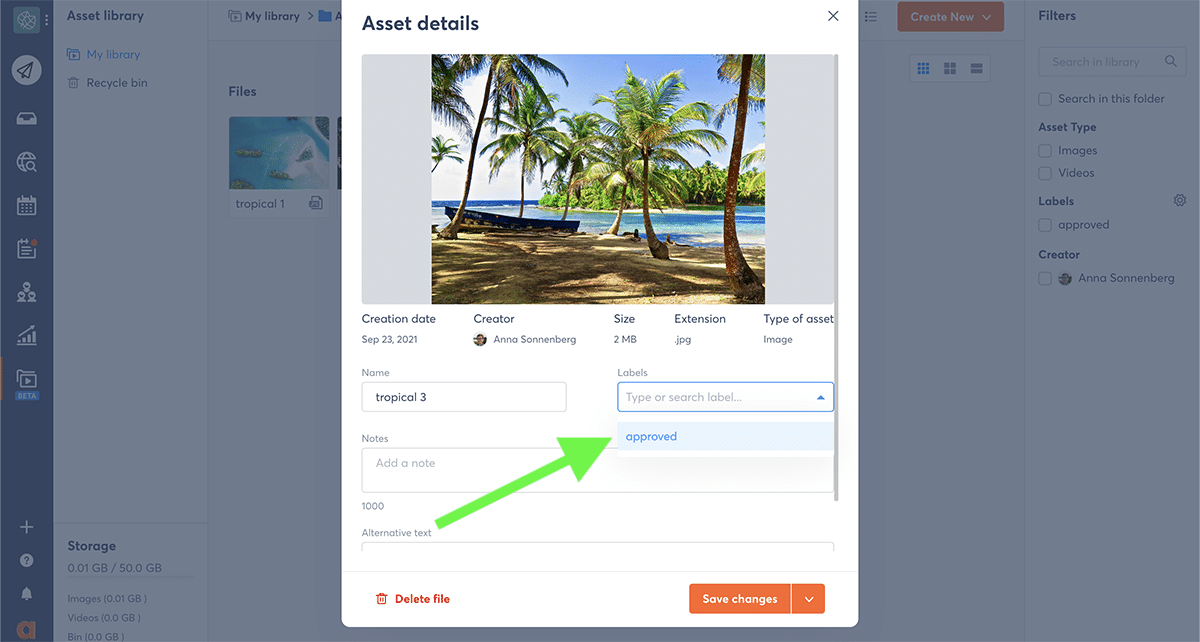
With Agorapulse’s bulk tagging option, you can organize multiple images at once. Select the images you want to tag and click the Add labels button. Then use the dropdown menu to find the label you want to add or type a new one.

Sort and filter content
After adding labels, you’ll be able to locate assets much more efficiently. When you search your digital media library, you can narrow your search by image title or folder too.
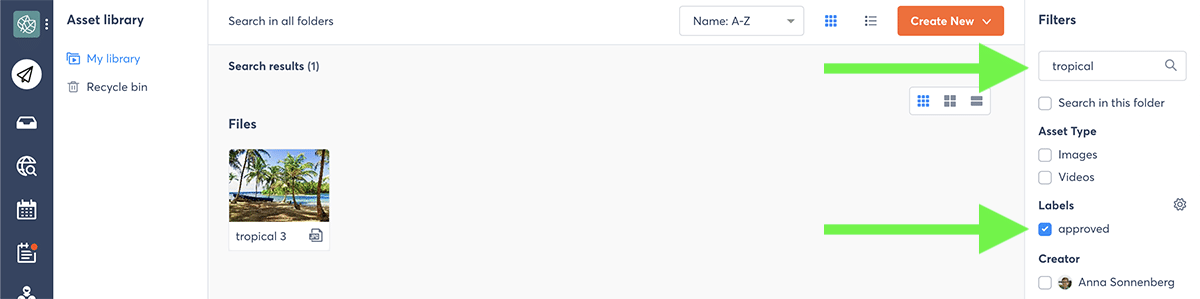
You can also filter search results by creator, making it much easier to find assets that you, your social media scheduler, or another account executive uploaded.
What to Store in a Creative Asset Library
Once you start using the Agorapulse digital media library, the possibilities for organization are endless.
Here are just a few ideas for different types of content you can store in your subfolders of your asset library.
Social media campaigns assets
Do you plan social media campaigns around certain seasons or objectives? You can create separate campaign subfolders for each initiative. That way you’ll be able to find everything for, say, your summer campaign in one convenient place.
Creating campaign folders can also streamline your planning process. When you view a campaign folder, you can get a quick overview of the content you’ve created. From there, you can confirm that your campaign images have a uniform style and color palette, and that they show ample variety.
User-generated content
Do your clients’ accounts tend to generate a lot of user-generated content (UGC)? You can download UGC from social media and save the images to your asset library so you can share them at a later time.
Using a digital media library makes it much easier to track the trickier aspects of UGC. For example, you can add a label to confirm whether you’ve received permission to republish an image.
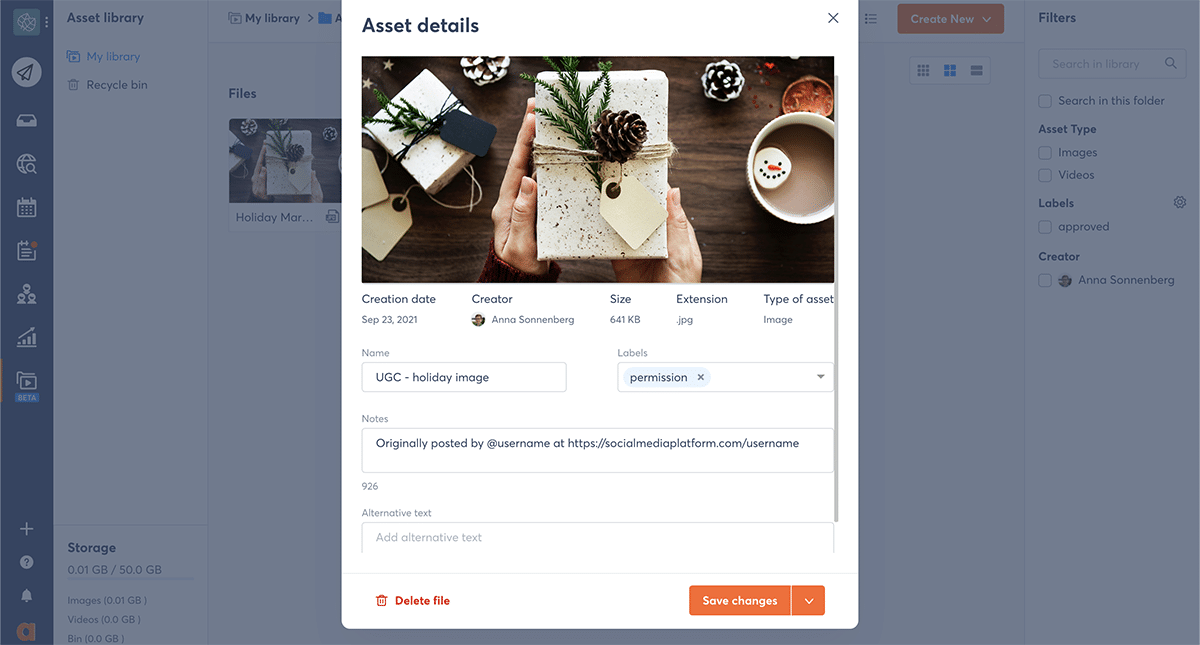
You can also include the customer’s username and a link to their original post in the internal notes for the asset. That way you’ll be able to credit the user correctly when you share the content on social media.
Testimonials and reviews
Do your clients receive a lot of great reviews and testimonials? Once you translate them into a visual format, you can save them to a Testimonials subfolder in your asset library.
It’s easy to avoid publishing a testimonial multiple times. Just create labels for published and unpublished items and add them where appropriate. That way you can easily find assets that are still awaiting publication.
Quotes and inspirational posts
You can use a similar workflow for storing quotes and other inspirational posts. As soon as you create a visual asset, upload it to a Quotes subfolder in your digital media library.
Then label it so you can find it instantly. For example, you can add a label to identify the ideal audience, the overall message, or the time of year you plan to publish it.
Online and offline events
An asset library is also helpful for creating content around both offline and online events. Create a separate subfolder for each event and upload assets as you receive them from clients.
You can always add labels to denote which assets are approved and ready for publication. To save time, you can also add internal notes about the content you plan to create for each asset. When you’re ready to start drafting social media posts, you’ll already have much of the planning and brainstorming out of the way.
Products, services, and features
In many cases, you’ll want to use product and service images and videos to showcase your clients’ offerings on social media. Having an evergreen Product Photos subfolder to draw from can save your social media team tons of time.
When clients update their products or refresh their photography, you don’t necessarily have to send all the existing assets to the recycle bin. Instead, you can move them to a Product Photos – Outdated subfolder so you don’t lose the original data.
How to Use a Digital Media Library Efficiently: Best Practices
Getting started with Agorapulse’s asset library and creating an organization system takes just a few minutes. But how do you actually create content with the assets and manage your library successfully?
Use the tips below to get the most out of your digital asset management system.
Add assets to social media posts
Once you upload assets to your library, you have a few options for adding them to posts:
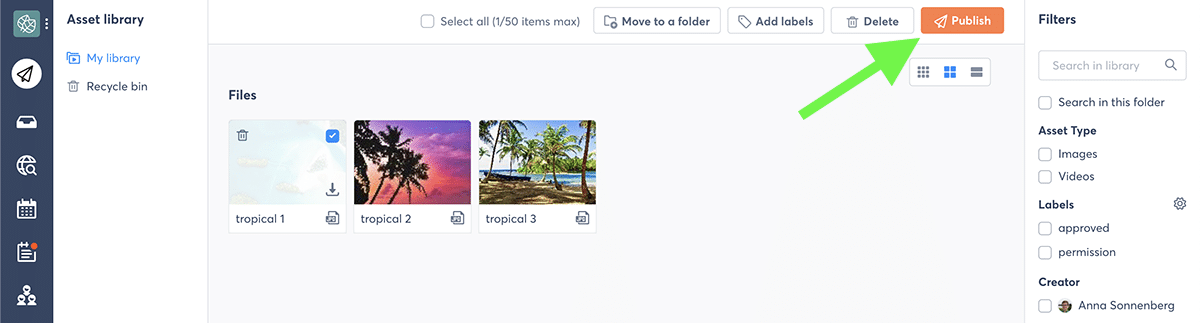
- Go to the digital media library and select one or more assets to add to a post. Then click the orange Publish button to open the assets in the social media post composer.
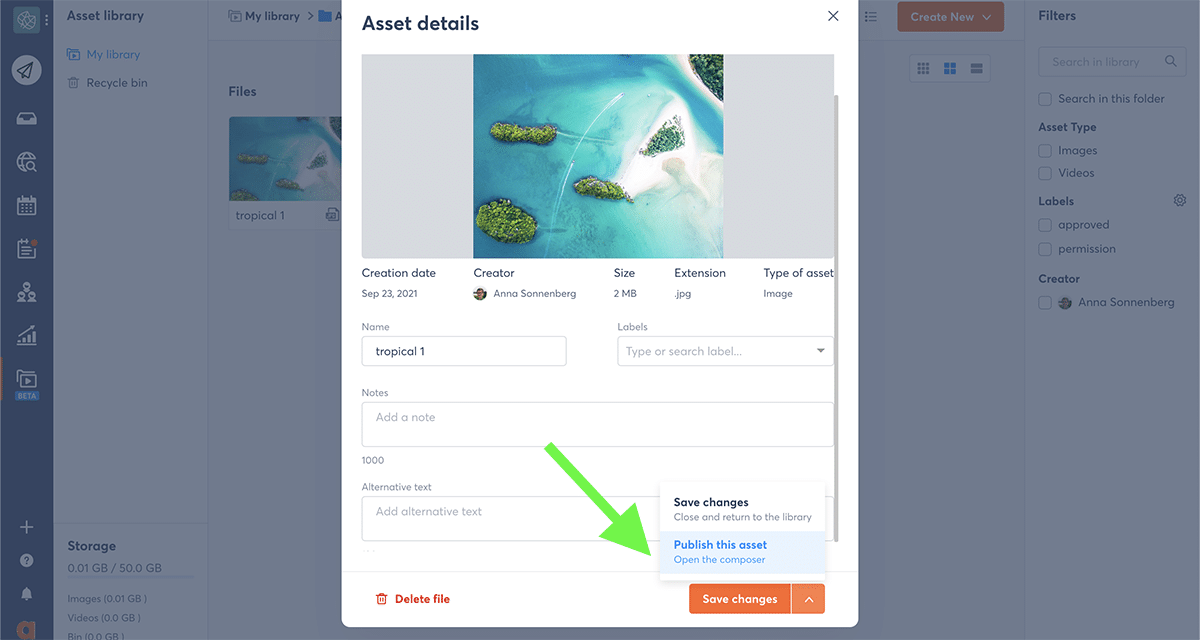
- In the digital media library, open the asset you want to add to a post. Click the arrow next to the orange Save changes button and select Publish this asset to start creating a post.
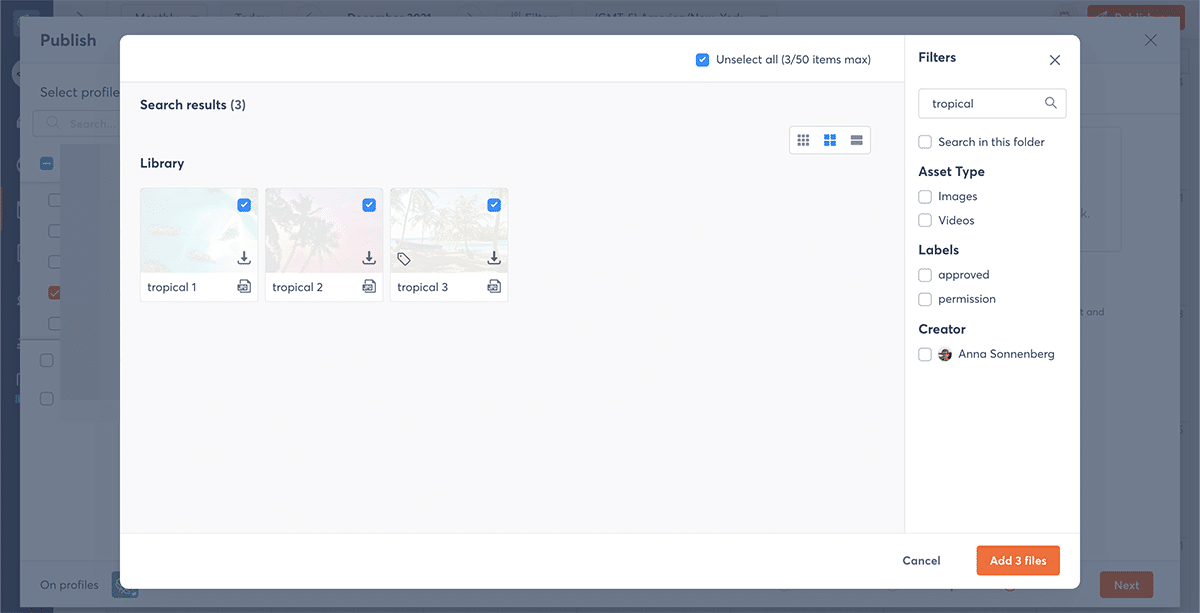
- Go to your publishing calendar and click the orange Publish button. Then click either the camera or video icon and select the Open Library button. Use the search functions to find assets and select one or more to add to the post.
Start social media drafts
It isn’t always possible to create and publish a social media post in a single step. Your team may need to do a round or two of brainstorming before you can create great social media content. Then you may need to get client approval before publishing posts.
An asset library can be a valuable addition to your creative process, no matter how you work:
- Leave your campaign or content ideas in the asset itself. Any notes you write in the asset library are for your team’s eyes only, so you don’t have to worry about clients or social media followers seeing them.
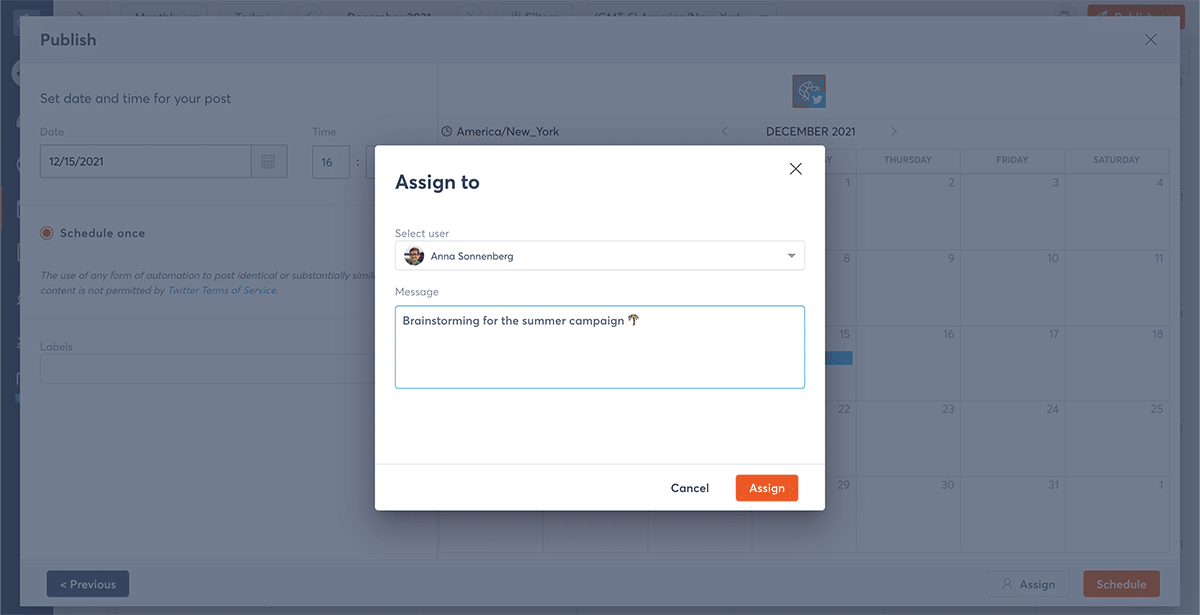
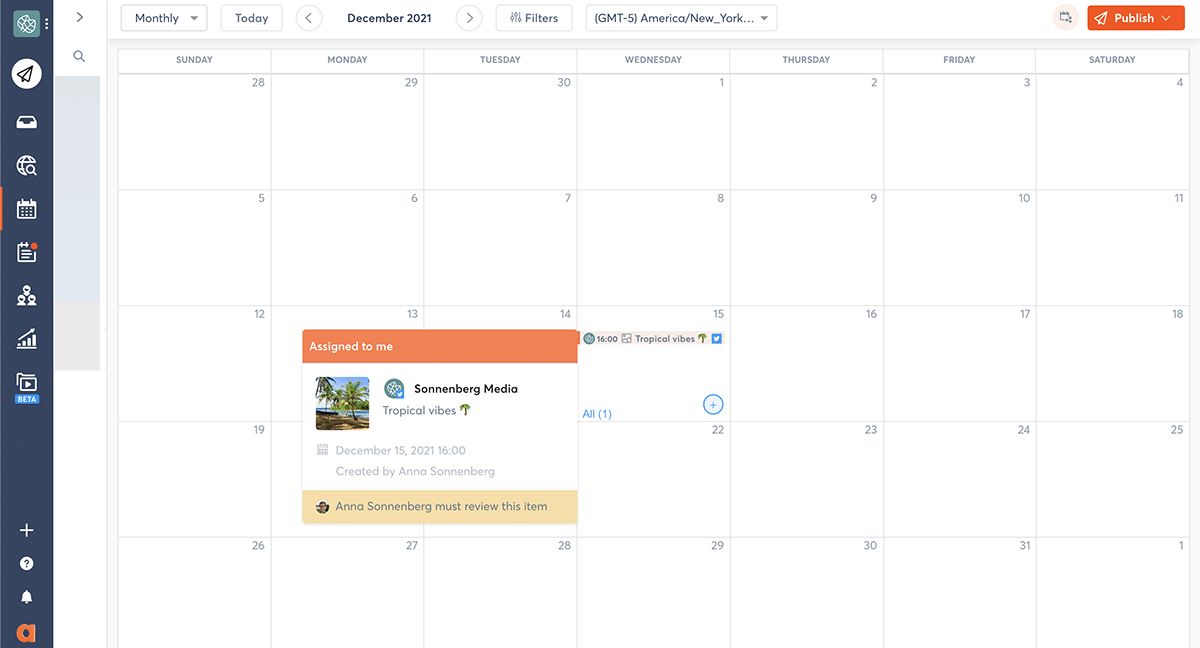
- Use the Agorapulse publisher to create draft posts with more fleshed-out ideas. Open the asset library from the publisher to add images or video to your drafts. Then assign them to yourself or an internal colleague for further development. You can find drafts highlighted in orange on the publishing calendar or in the To approve tab of your publishing lists.
Secure client approval
After drafting social media posts in Agorapulse, you may want to run them by your team before scheduling. You may also need to get client approval before the content goes live.
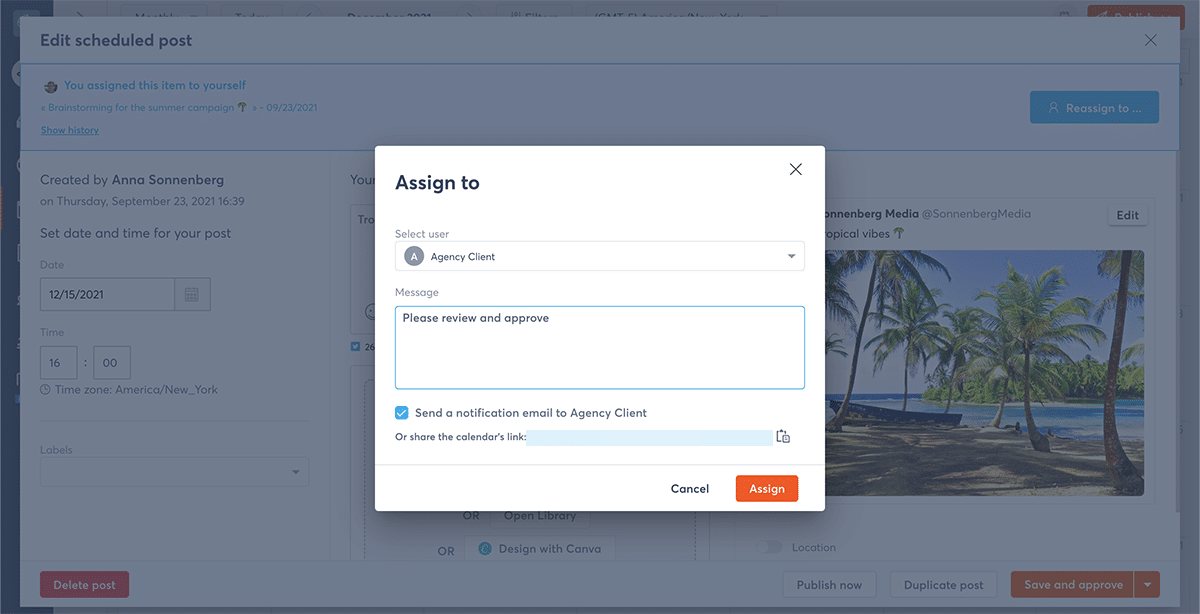
Instead of adding clients as Agorapulse users, you can create Shared Calendars for them to review and approve posts scheduled on their social profiles. Clients can comment on posts to add input or reject them if they need more work.
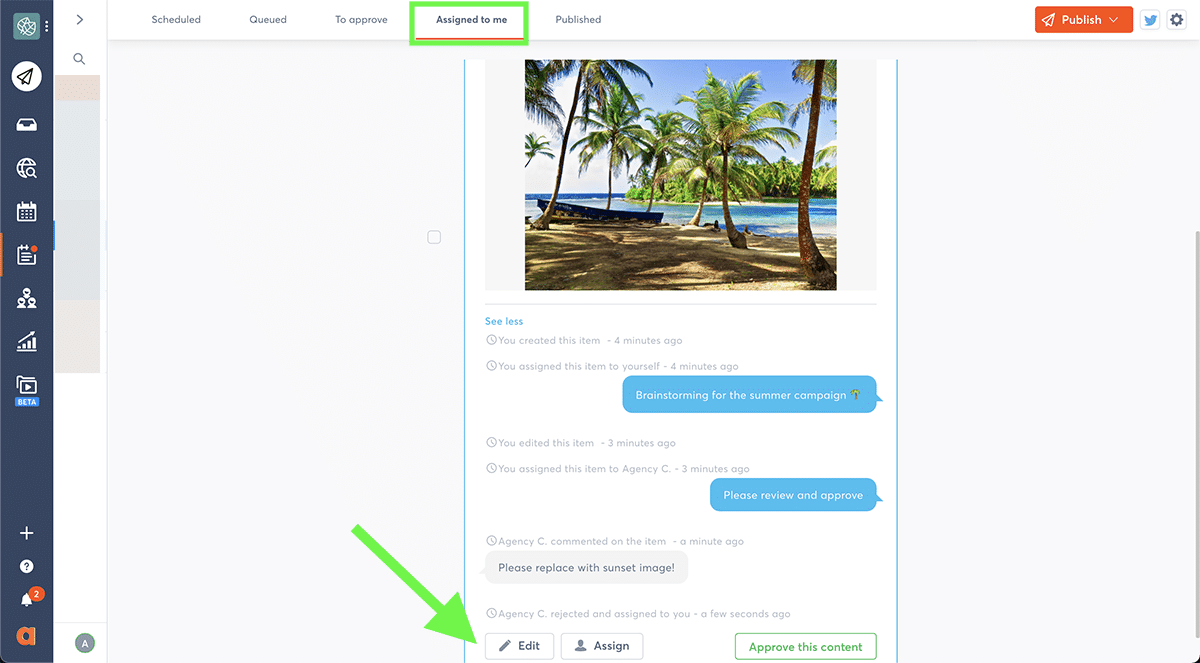
To find posts that need editing, navigate to your publishing lists and click the Assigned to me tab. You can click to edit posts in the publisher, where you can access your digital media library and replace any assets. From there, you can reassign or approve posts.
Develop reliable workflows
A digital media library is designed to save your team a lot of time. But like any MarTech tool, it’s likely to be more effective when it’s an integral part of your process.
To get more out of your asset library, incorporate it into your workflow. For example, you may want to upload images directly to Agorapulse as soon as you receive them from clients. That way your team can begin organizing them and planning content right on schedule.
As part of your workflow, take care to review assets periodically. You’ll want to make sure they’re still relevant and up-to-date, especially if they’re more than a few months old. The timing for your review process may vary depending on each client’s creative cycles.
To remove outdated assets from your library, select them and click the Delete button. You can retrieve them from the recycle bin for 30 days before they’re permanently deleted.
Create standard systems
To find images and videos as quickly as possible, consider using a standard naming system for your asset library. For example, you may want to add client names or campaign names in each file name. Alternatively, you may want to use descriptive names to make images with similar concepts easier to search for.
Use a similar approach for asset library labels. Structure them in a way that complements your folder system. For example, you may want to reserve asset labels for statuses like Approved for publication or Already published.
In Conclusion
Organizing creative assets doesn’t have to be as difficult as you might think—and developing a reliable process can boost your efficiency. Take our asset library for a spin today to find out just how much time and hassle you can save.
Get started on saving time and energy on your own social media management! Check out our free trial of Agorapulse to help you schedule, track, and measure all your social media efforts.


